
I wanted to share my best practices when it comes to setting up your Adobe Lightroom Catalog because I think it's very important to start off on the right foot when editing, backup and archiving your photos. Lightroom is an incredible photo editing program that has a ton of features which can become very overwhelming when you are first starting out. I have studied and mastered how I use Lightroom to edit my photos and I wanted to share with you how I prefer to setup my Lightroom Catalogs along with some of my favorite Lightroom Keyboard Shortcuts.
I will preface this post but saying that I wouldn't know anything about Lightroom if it wasn't for Jared Platt's Creative Live course Lightroom 101. I bought that course and watched it 3-4x's in a row to truly understand how to setup my catalog and edit my photos as efficiently as possible. I would highly recommend checking out his catalog of courses on Creative Live. I met him once at WPPI and thanked him for helping me and changing my editing workflow process from top to bottom.
How to Setup Your Lightroom Catalog
No. 1 - Create a NEW catalog for each and every job you photograph. Think of a Lightroom catalog as filing cabinet and your photos are the "files" inside. You want to keep all of the folders and files inside one filing cabinet at a time. If you were to keep all of your photos inside the same catalog, archiving and and keeping track of your "files" (aka. your photos) is going to become a hassle and you could get the dreaded question mark (Folder Missing Icon) inside of your catalog. To keep everything organized, I create a new folder for each client and create the same file set inside their folder which includes a Catalog, Images and Print folder. When I am done organizing, editing and exporting the images and have delivered them to my clients, I will archive them to my backup drives and within time, deleted them from my computer. If I were do this while only using one main catalog, I'm going to have a hard time keep track of all the photos that belong to each job. For me, it's peace of mind knowing that everything is in ONE place and can be easily opened, archived, and worked on anywhere without ever missing important photos.
No. 2 - Turn on Automatic Backups and Write the XMP data for Each Catalog. After you've created your new catalog you should immediate turn on two important functions of Lightroom every single time.
It seems like a no-brainer but turning on Automatic Backup's every time you quit Lightroom is just a extra level of protection for your files. Sometimes catalog's get corrupted but if you've turned on this feature, you can simply go into your Catalog > Backups Folder and simply unzip the last saved backup and start working as if nothing happened. It's 100% worth turning on and takes only a few seconds to complete once you quit the program.
Open Lightroom > Go to the Lightroom Menu > Catalog Settings > In General Tab > Backup > Choose Every Time Lightroom Exits from the drop down menu.

When you are editing photos inside Lightroom (and hopefully your are shooting in RAW) all of the changes you make to the image don't actually touch the image. What's happening is the data is being written to the "sidecar" file which is the XMP file. The XMP data writes on top of your photo like a piece of vellum. It's only a layer that can be easily removed however, Lightroom doesn't automatically process these changes while you are working. Why? I have no idea so you have to tell the program to do this for you thus saving you time and energy if the program were to crash and you lost all your work. Nobody wants that!
Open Lightroom > Go to the Lightroom Menu > Catalog Settings > In General Tab > Metadata > Check the box next to "Automatically Write Changes to XMP".

No. 3 - Build Your 1:1 Previews for every catalog - I'm sure you've heard of Smart Previews when importing your photos into Lightroom. It renders a faster preview of your image so you can edit faster BUT it's still not the fastest. It can still take time to render each image inside of Lightroom thus slowing down your editing time. Your images can look pixelated until Lightroom catches up and processes the file. I find that when I make the Smart Previews upon import, I still need to build my 1:1 Previews to have my images load instantaneously with absolutely no lag time.
After your images have been imported successfully into Lightroom, select all the images in the Library Module. Next, go to Library Menu > Previews > Build 1:1 Previews. It will take a while for the previews to load so I will go make myself a cup of tea or respond to emails until the process has completed. Once it's done you are ready to edit your images without any rendering or lag time in editing. FINALLY!!
No. 4 - Keyboard Shortcuts - Oh my goodness, Lightroom has a million shortcuts that will become second nature to you the longer you use the program and sometimes they change them on you without warning, which is the worst!
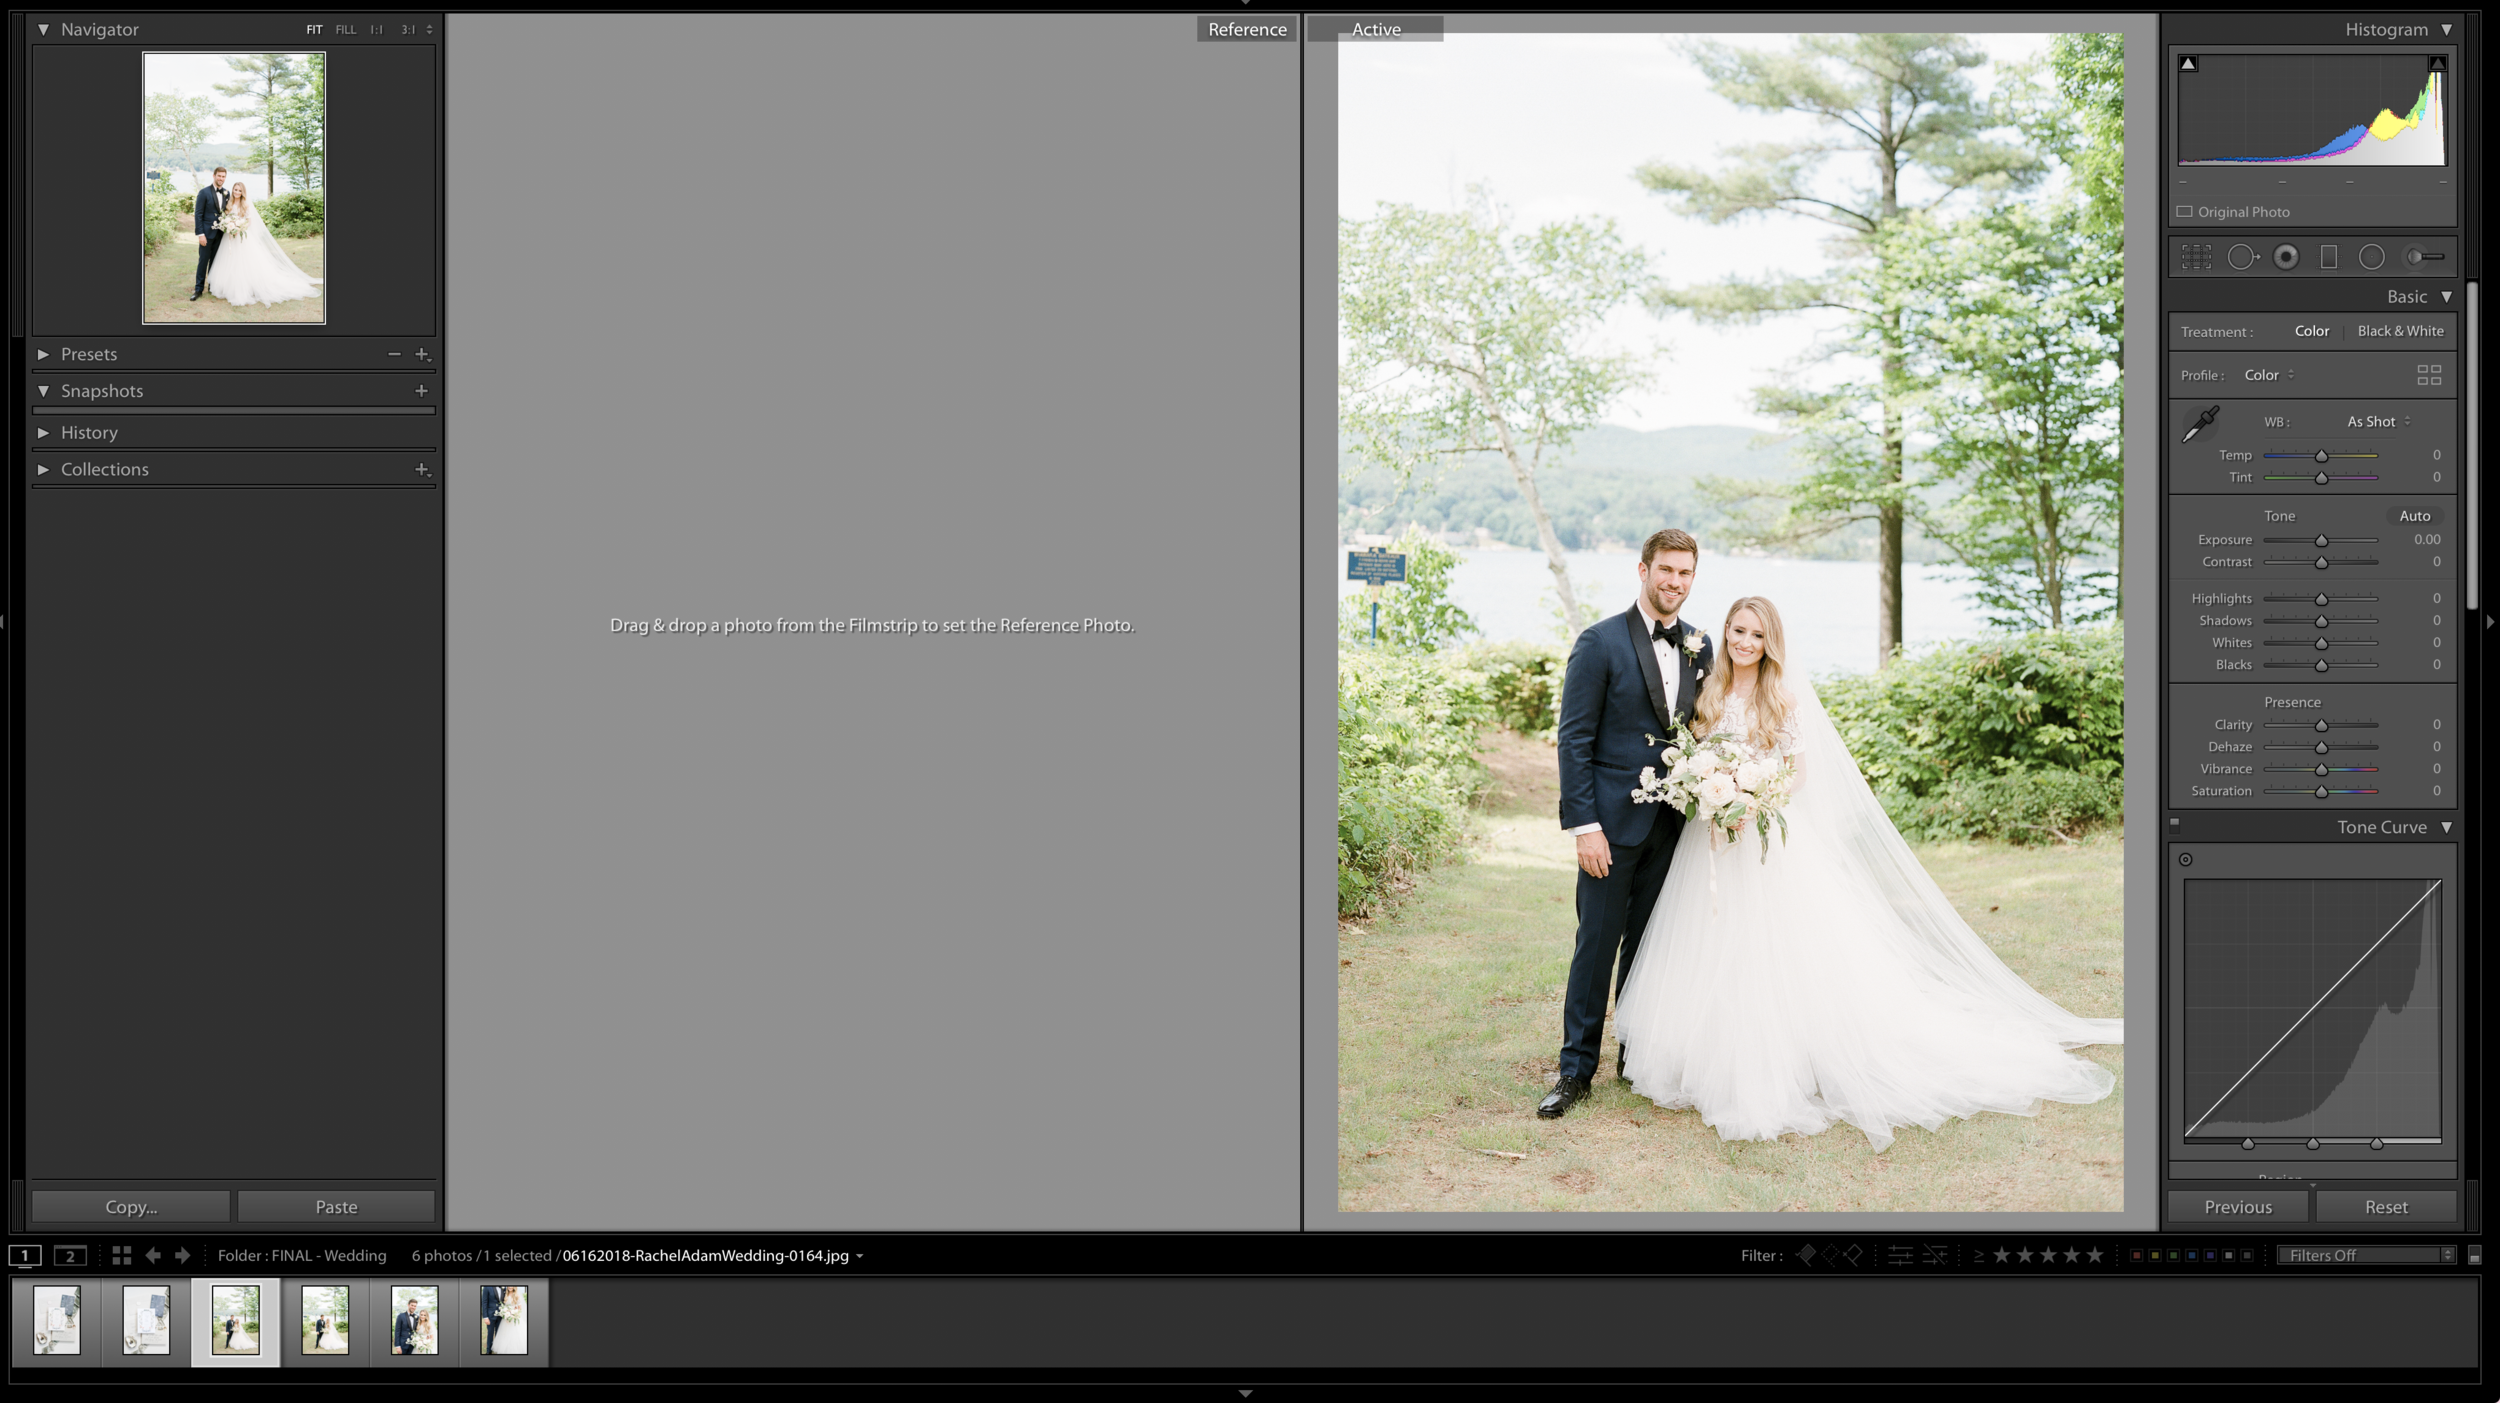
Keyboard Shortcut: SHIFT + R - REFERENCE VIEW
My favorite keyboard shortcut is the Reference View. You must be in the Develop Module (D key) for this to work. The Reference View creates a split screen inside the Develop Module for you to do a SIDE-by-SIDE edit without having to use the pop up window option anymore. Once it's selected, you can drag your Reference photo on the LEFT and on the right, you can edit and toggle between photos to match your REFERENCE image. It never moves until you drag and drop a new REFERENCE image to use. Seriously, it's the BEST shortcut ever for hybrid photographers like myself or anyone looking to match images.
Keyboard Shortcut: SHIFT + F - FULL SCREEN MODE
I prefer to use my Lightroom screen to it's fullest capacity which means I do not want to see my menu bar (For Mac Users), my dock, the clock or any other apps while I am editing. So I love the SHIFT + F keyboard shortcuts. They allow me to toggle my screen from being able to see my menu bar, to completely hiding it. It's a great shortcut to help you max the screen space that you have.
There you have it! My favorite Lightroom Catalog tips and setup options I use just about everyday. I hope they were helpful and will save you time and peace of mind in the future. What are some of your favorite Lightroom Tips and Tricks? Any keyboard shortcuts you want to share? Please leave them in the comments below!
Want more Tea? One-on-One Coaching is now available! Find out more here!
Stay in the know! Subscribe to our newsletter, podcast, join our facebook group and be sure to follow @jainekershner on Instagram for the latest Tea with Jainé IG TV episode.
Greetabl Discount - Save 20% Greetabl and Greetabl Insider Pro. Use code JKERSHNER at check out.
Interested in collaborating? Please fill out our contact page and say hello!